
ComposiMold and ImPRESSive Putty are the most versatile, easiest to use, and best mold making materials available. They are your tools for duplicating your own parts. We have seen it being used successfully for thousands of people, and we know you can be successful too.
And to help you be successful, we want to share with you tips and best practices that we’ve learned from using our own products. We are going to do our best to describe to you the best practices that we’ve learned from your feedback, from making hundreds of videos, and from demonstrations and projects throughout the world. So here we go:
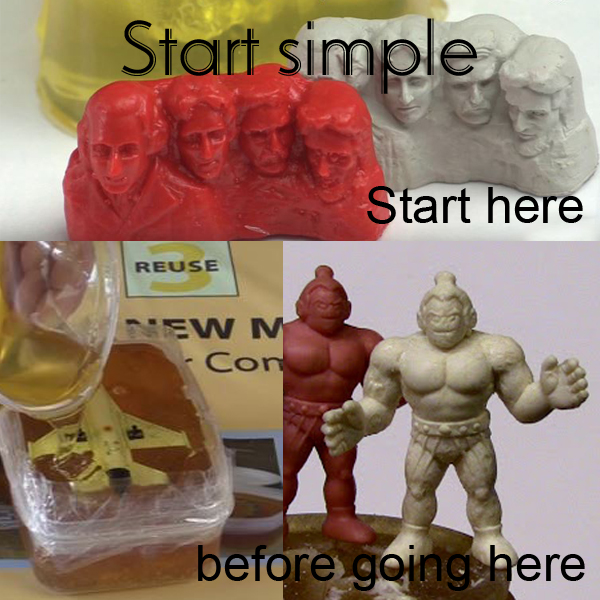
Tip 1. Start small, start simple, it’s reusable. Everyone wants to start out with an action figure, hollowed out double sided figurine, or thin walled toy motorcycle. Go for it. You Can duplicate almost anything. But we recommend doing this as your second or third mold, not as your first mold. Remember, ComposiMold is re-usable, so you don’t have to worry about messing up. You can always re-melt and start again. That’s surprisingly hard for some people to grasp, as they have been so engrained to think of silicone mold making or even plaster molds where you only have one chance to make a mold. No, that is absolutely, not the case with ComposiMold or ImPRESSive Putty. You can make as many molds as you like. So start simple, find success, and build up to advanced mold making techniques.
So what do we mean by starting simple? Look for (or you can make with Plasticine or polymer clay or wood) a piece for your first mold that has a flat side. This is called a relief sculpture. It doesn’t have to be completely flat. It could be tall or short as long as one side is flat surface to it so you can set it into a simple mold box such as a cup or container. Also, look for pieces that don’t have thin protrusions coming off at different angles, and don’t start with extremely contorted shapes. You can definitely mold it, but it will take some practice, which is why simpler shapes are create a nice solid mold making experience.
2. Adhere your bottom to the bottom: There’s one thing that even the expert mold makers still forget to do when you’re in a hurry making a mold. The number one mistake that occurs when making molds with ComposiMold is not adhering your part to the bottom of your mold box. Lightweight parts will float. I still make this mistake, typically when I’m trying to make a really quick mold and trying to take a short cut. Plastic floats, so adhere it to the bottom of your container. If your part floats in water, it will float in ComposiMold. To adhere it, hot glue it to the bottom of the container. You can also hold down smaller objects with polymer clay or double sided tape. For big objects, you can screw the part down to the bottom. Another way to hold your part down is to pour a little ComposiMold around your part while it is in the mold box, let that solidify, and after it has solidified, pour more ComposiMold. The first ComposiMold will hold the part in place.
3. No Boiling and pour cool: Here’s a tip for melting ComposiMold and ImPRESSive Putty. Don’t let the mold making materials boil too much as it will degrade the mold making materials over time. Also, overheating the ComposiMold creates bubbles in your ComposiMold. We give recommended times for melting the material in the microwave, but of course, every microwave is a little different so start with short intervals of 30 seconds to a minute until you understand how it’s going to melt. You can also melt in a double boiler or chocolate melter. That’s a little slower, but will allow you to control the temperature easier. If you do boil the ComposiMold, don’t worry too much, you can let the ComposiMold cool slowly, or even better is to keep the ComposiMold warm so it stays melted and the bubbles will rise up and out, and you can still make awesome molds.
When making a ComposiMold mold, you want to typically pour the ComposiMold OVER your part. You don’t want to place your part into the ComposiMold. By pouring the ComposiMold over your part, you’ll get fewer bubbles stuck under your part and you’ll typically get nicer molds.
MELTING ComposiMold: To melt, heat the ComposiMold to 130ºF. (Do not exceed 200ºF). This can be done in a double boiler or a microwave. When heating in the microwave start with short intervals of 30 seconds. The 6oz. container should take about 45 seconds to fully melt.
After melting, stir the ComposiMold gently to let the temperature equilibrate and cool before pouring your mold. It’s perfect when it has a warm honey-like consistency at (130ºF-140ºF).
4. Use Bubble Buster and look for bubbles in the cracks: Now in many cases, you will still have bubbles form while making the mold. This is going to happen no matter what mold making material you use. The nice things about ComposiMold is 1. You can see the bubbles, and 2. You can get rid of the bubbles. We have a lot of tips of how to remove bubbles, and we’ve made a separate video just on this topic, so please watch that video for more details, but here are the key tips:
1. Use Bubble Buster
2. Pour ComposiMold when it is cool, but still a liquid. It will be thicker, but fewer bubbles will form. It will still pick up All the details.
3. Use a paperclip to pull bubbles away from the surface of your original. You don’t have to pop the bubbles, just pull them away from the surface…This is especially important where there are undercuts, or in crevices where the bubbles get stuck.
5. Don’t worry about the spill: Here’s another tip: You will probably spill ComposiMold or get ComposiMold on your fingers or clothing at some point. Don’t panic. In most cases, just let ComposiMold cool and peel it away and re-use it. It’s still good. You can also wash ComposiMold away with hot soapy water. If you have it on your fingers, let it cool and pull it off.
Some people have suggested cutting up ComposiMold before melting it. You can, but you don’t need to. It melts fine either way. But here’s a small tip, you don’t need to melt all of it every time. If you only need a small amount, then just melt it a little. If you need more, melt more. You can mix it together. Even ComposiMold that has partially hardened can be mixed with more ComposiMold. If you are pouring ComposiMold on to other ComposiMold that has already hardened and you want it to stick, just melt it a little with a hot air gun, heat gun, before pouring the other ComposiMold on top.
6. The Container will crash, the ComposiMold won’t: Now the container that ComposiMold comes in IS microwavable, but it will fall apart well before the ComposiMold does, so just place the ComposiMold in a microwavable container like a Tupperware dish. Keep it covered, and it will be good for a long, long time.
7. Store your molds in a cool dry place in a Ziploc: How to keep your molds. Sometimes you make a mold that you want to keep. You can. Just cover your mold by placing it in a Ziplock bag or other sealed container, keep it in a cool, dry place, and it should last you several years with no problems. And of course, you can re-melt it anytime you like.
8. Fix a mold with a heat gun: You can patch a hole in a mold by melting some ComposiMold and brushing it over the hole. This works really well if you place your original in the mold while you are fixing the whole. You can melt the ComposiMold with a hot air gun.
9. Clean your mold with a cold, wet wash cloth: Use a cold wet wash cloth and wipe away any particles. If you need to, rinse it under cold water and then make sure it has time to dry out. Make sure it is dry or it will be slightly sticky. If it is sticky, you may need to re-melt and re-make the mold. It will be fine after that. If you are using non-food casting materials, you can also filter the ComposiMold through cheese cloth or a medium or large hole paint filter. Don’t try to filter the ComposiMold through a coffee filter. It won’t go through.
10. With adult supervision, kids can have a blast with ComposiMold: How to Use ComposiMold with kids
ComposiMold and ImPRESSive Putty are a great way to introduce the 3 dimensional arts and start to teach the skills for creating duplicates. And it’s fun. Young kids just love the feel of ComposiMold. Others want to create. Personally, my daughter loved to make chocolates, mostly because she loved to eat chocolates and she really loved the cool shapes…getting a gummy Lego or a Chocolate Squiggy ring pop, now that’s cool.
The key for mold making with kids is to start with success and keep it simple. A My Little Pony is doable, but not with young kids. Choose simple objects that have bulk and are relief sculptures. They’ll love it and after a couple successes, they can start to become more involved.
We highly recommend that an adult does the melting and let the mold making material cool. After it is cooled, but still a liquid (130 F0 the kids can pour the molds as long as you are right there to supervise. Be careful of moving plates and random pours.
11. How to Use ComposiMold in Your Art Classroom
Sculpture, stamping, home economics, material science, industrial arts, Yes! Go for it.
Have the ComposiMold melted prior to the class beginning. For a group of 15 to 20 students, 5 to 10 pounds should be enough. I’d recommend using a double boiler, day cooker on as low as possible (and turn off if you see it bubble). That way you can have the melted ComposiMold ready to go. You may want to have the students sculpt a shape. Plasticine is great for this as the Plasticine can be re-melted. However, be careful the ComposiMold is not too hot for the Plasticine. Plasticine cools at around 150- 160 F, so make sure your ComposiMold is cooler than this. It should be a thick honey when you pour your molds. And as we’ve said many times. Start simple and build up to more complex molds. Just like all of us, the students will want to make something complicated, thin walled, with lots of undercuts. They can, but have them do that after they have had success with a simple mold.
Typically, because of the low cost, plaster is used in classrooms. Be sure to use talcum powder as a release agent and to keep the molds dry. I’d also recommend at least showing them a casting in plastic or rubber so they can see what can be done. You can also have them download a free copy of our mold making book if any are interested in learning more.
And of course, have fun with it! The reason ComposiMold exists is to make great molds and have fun.
SOLIDIFYING Your Mold: Simply let your mold cool. ComposiMold solidifies when it cools back to a flexible, rubbery, polymer. (To speed up to the process, you can put your mold in the refrigerator.)
De-mold your master by pulling it out or make a cut down the side of the mold and open it like a book. Tape it closed before you make your cast.
ComposiMold’s greatest advantage is its reusability. All you have to do is remelt your mold and pour a new one!
12. And of course, have fun with it. That’s why we’re here.