Thank you Toby for sharing your trials and experiments with ComposiMold to make a replacement sconce. The following description is the process used by Toby to replace a 1960's light fixture. You'll see that this took many experimentations and he re-melted and re-made the ComposiMold mold multiple times. Here's what he writes...
The procedure:
- Mold, mold, mold.
- Making it perfect will avoid a lot of extra work.
- Multilevel mold: If the casting has part(s) which jut out, you can form your mold around the skinnier parts to avoid using a ton of mold material.
- You can create walls in your mold box affixed with silicone to better form-fit the object.
- Prop up the object in the middle if possible. Doing it at the edges wrecks your mold.
- Release agent: required to easily remove epoxy object from mold.
- Use a sharpie to create alignment marks before you remove the original from the mold.
- Easiest way to remove original item is probably cutting out the back.
- If possible, try to leave the back and front the mold attached, even if only slightly. Alignment of back to front is important for such a thin-walled item.
- Epoxy
- Multiple castings: are possible with epoxy, to fix areas. You will likely then need a topcoat.
- Resin-to-hardener ratio: be careful or epoxy can be soft.
- For large batches, e.g. casting, you can eyeball amounts in a larger measuring cup.
- For small batches, e.g. finish coat, use 2 small cups, one each for resin and hardener, then pour/spatula into bigger cup for mixing.
- Epoxy does not stick to plastic well, so after it dries you can peel it off and reuse measuring cups.
- Epoxy is exothermic. How hot depends on the object. A thin-walled sconce does not get too hot.
- Colorant: There are lots of resin dye colors, just takes a few drops.
- Sand to final shape.
- Sand outdoors and/or use mask to not breathe in dust.
- 100-200 grit sandpaper if you are going to topcoat.
- Possibly finer for finish sanding if not top coating. I’m not sure how well it would polish.
- A palm sander comes in handy.
- Final coat: do this in lieu of trying to polish. It should provide a glossy finish.
- Prop up the object in the middle
- You need to do entire surface, cannot just do an area.
- Flood the zone: plan on a lot dripping off.
- Should still take considerably less material than for the casting.
- Use an artists brush to spread out.
- Probably do not need clear coat.
- You have 10 minutes or so. Work quickly but don’t rush.
- The epoxy will be spreadable for several minutes, then get too thick. Once the epoxy starts getting thicker, stop. In an emergency you can make another tiny batch.
- For small batches, use the 2-small-cups method.
- Do this step in dust free environment. Might consider putting a sheet plastic hood over until it firms up.
The saga:
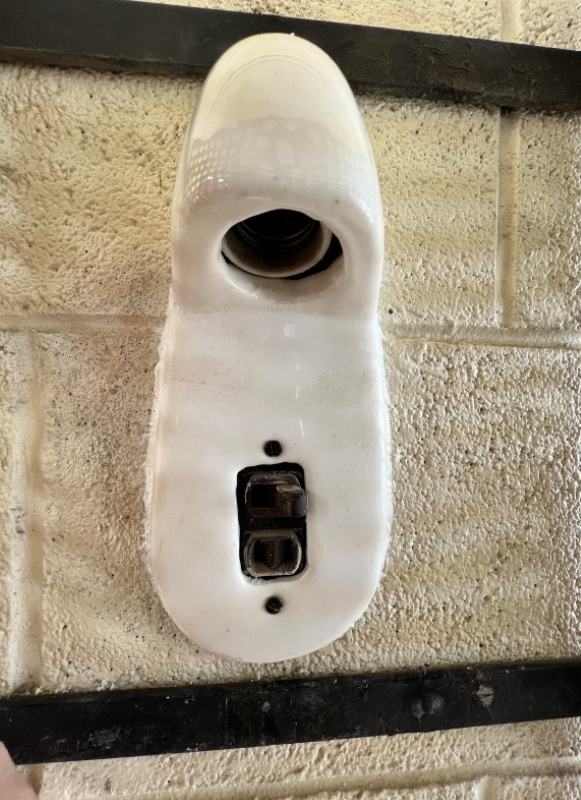
One of my sconces was broken in half. They are circa 1960. I did not want to put in a non-matching sconce or replace 7 sconces, so I made a new one.
Some of the pain would have been lessened by making a better mold.
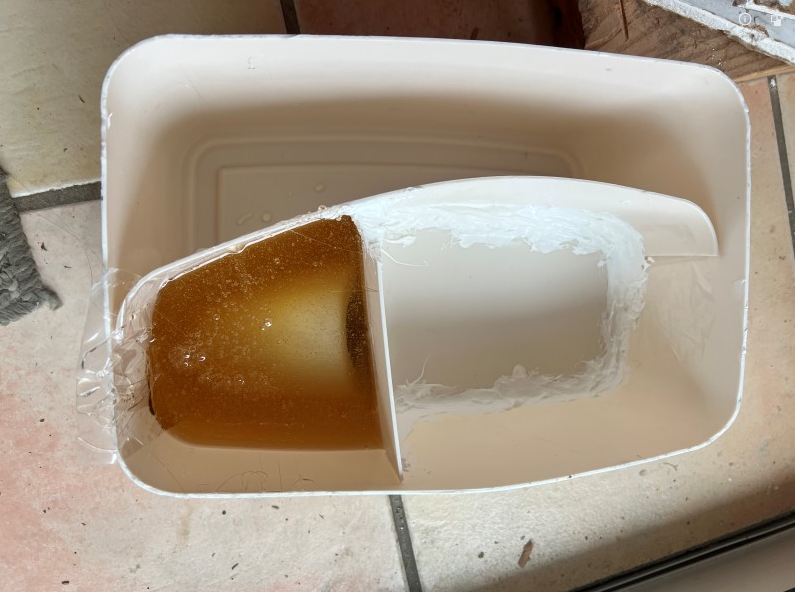
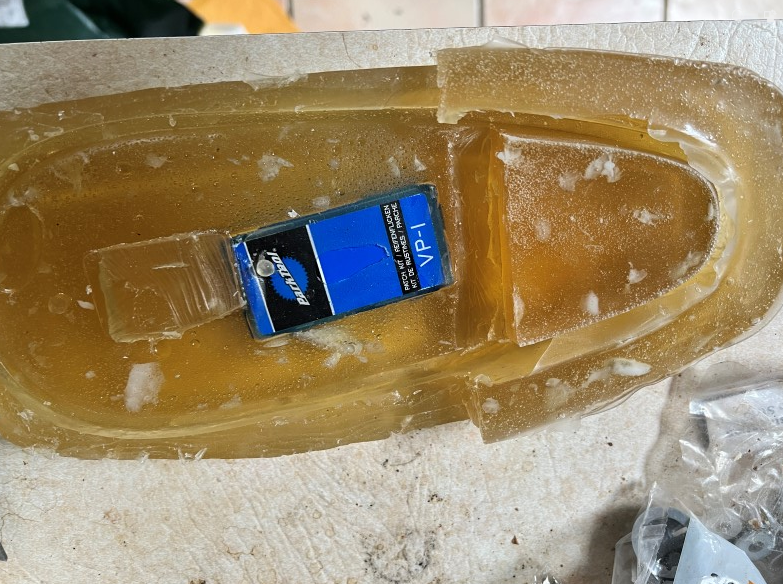
Used old plastic trash basket. Created an inner wall to save on mold material.
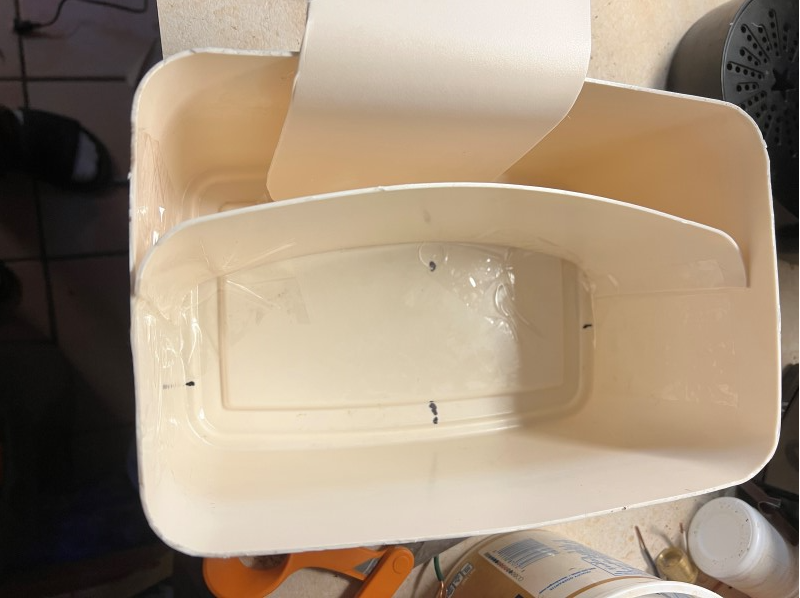
Made an upper wall, again to save on mold material. Used an existing good sconce to create the mold.
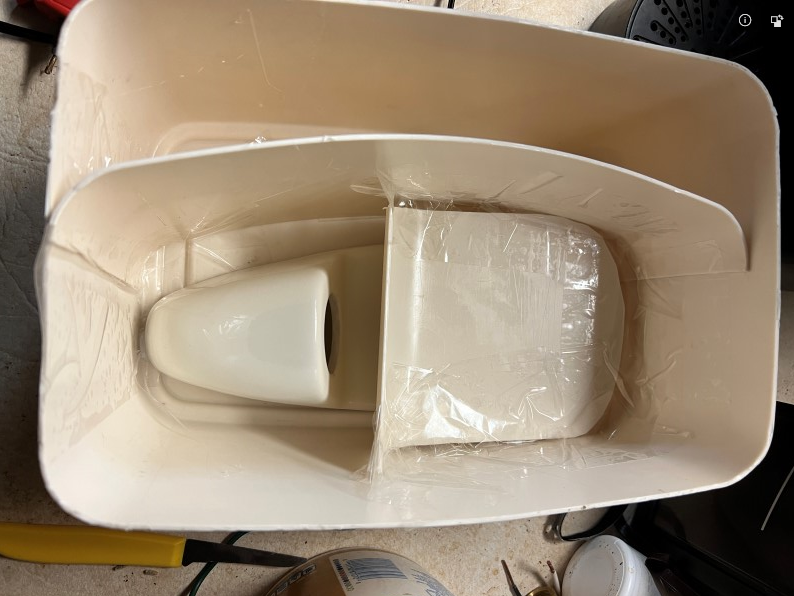
Big bowl of mold gel. Was not sure how much I’d need. I needed all of it, and more.
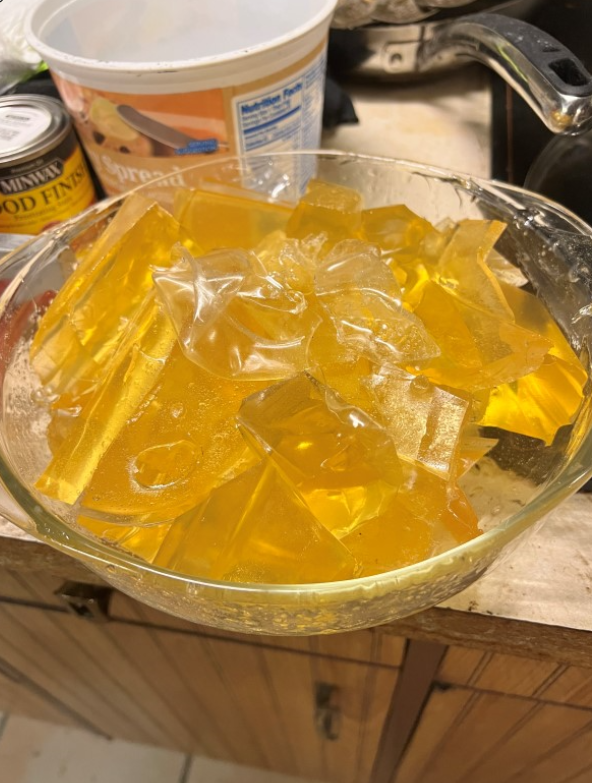
Changed to using silicone to hold the walls in place, heated the mold gel in a microwave, poured it in.
Mold cooled.

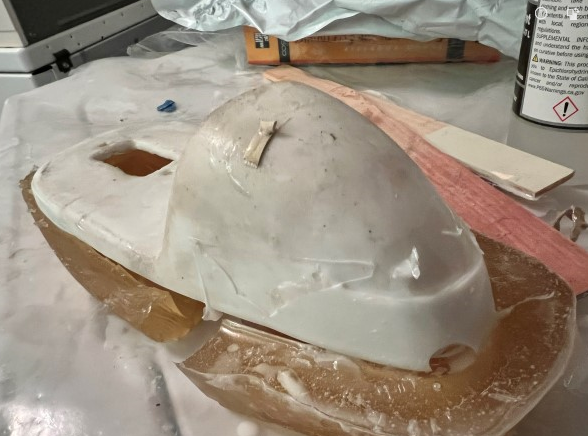
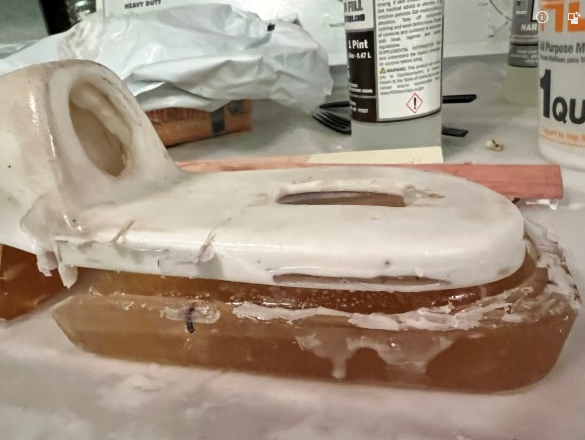
Cut out the sconce by removing the back. I probably should have left a little flap in place. Registration, i.e. alignment, is important.
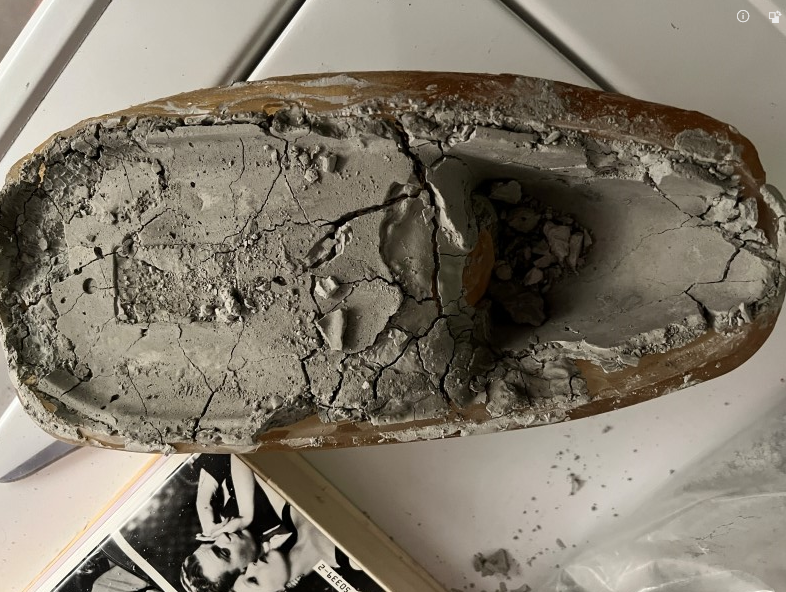
Tried ComposiStone (faux pottery stuff (Smooth Plaster/Cement.) Does not work well with thin-walled sconce.
Switched to using heat-resistant epoxy. Note my sophisticated jig.
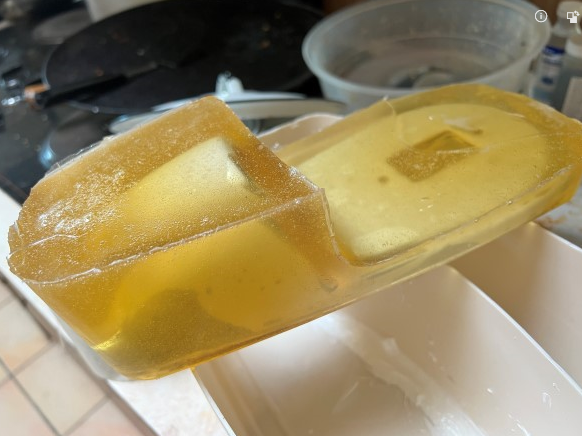
Initial result.
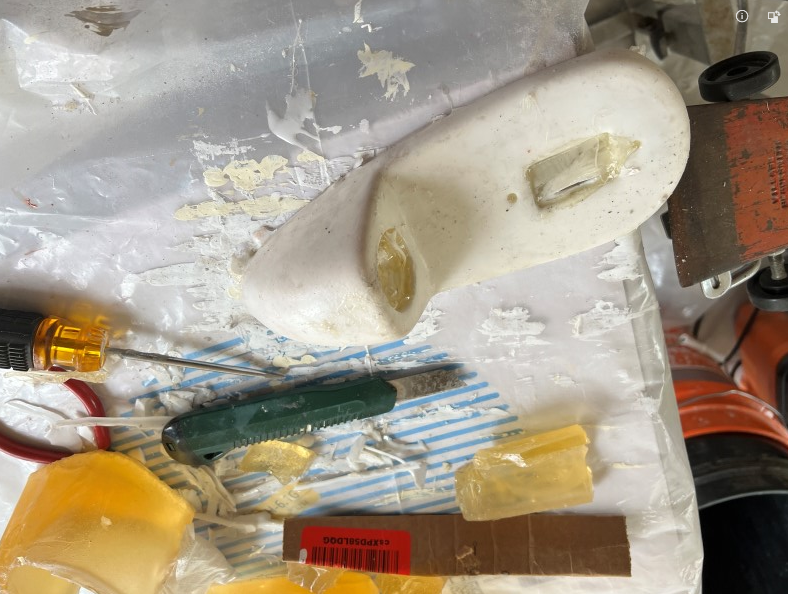
Cleaned it up a bit.
But there were issues. Supporting the sconce at the edges during the molding process was problematic, also it was difficult to precisely position the back of the mold into the front.
Side had issues too.
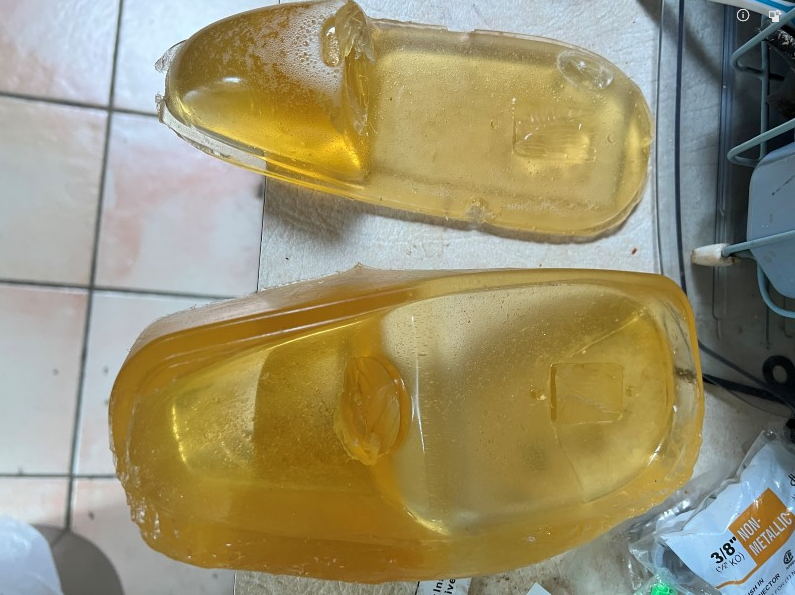
Created a new mold (the stuff is reusable.) This time I supported the sconce in the middle with a little box.
Added mold material to the bottom. (still an issue at the bottom, I had to do it again).
The side still needed work. (I did it again).
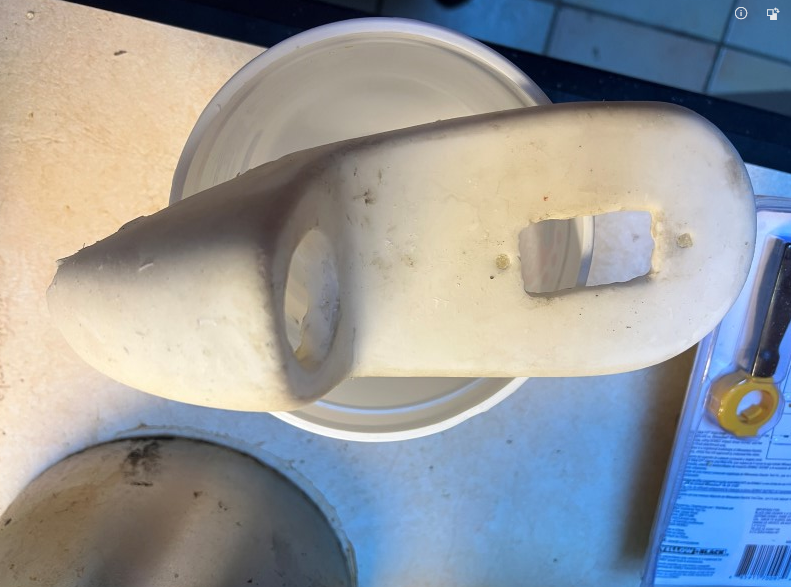
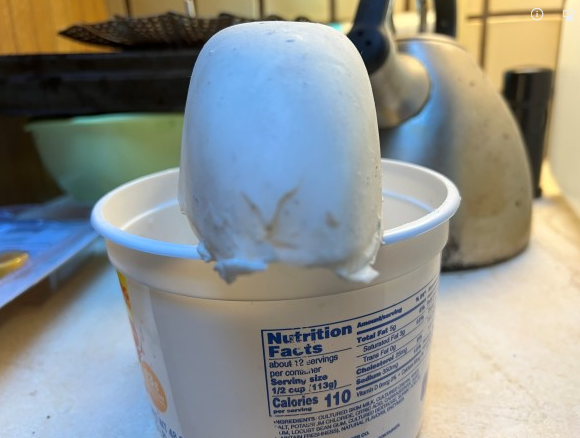
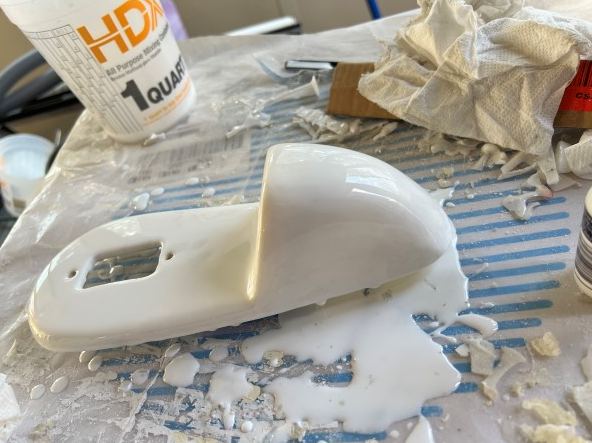
Eventually I got a good (enough) casting. I had to do a lot of sanding to incorporate the extra material, smooth things out. I used a palm sander. I used a Dremel for the bulb and outlet holes, drilled out the screw holes.
What I got was a fairly clean but matte sconce. I wanted glossy. So I did a “pour-over” technique, spreading with an artists brush. It worked well, just left drips on the bottom edge to be sanded.
Mounted it on the wall.
Closer. The back edge is caulked so slightly irregular.