All prices are in All prices are in USD
Posted by Toby Wahlers on 26th Apr 2022
Thank you Toby for sharing your trials and experiments with ComposiMold to make a replacement sconce. The following description is the process used by Toby to replace a 1960's light fixture. You'll see that this took many experimentations and he re-melted and re-made the ComposiMold mold multiple times. Here's what he writes...
The procedure:
The saga:
One of my sconces was broken in half. They are circa 1960. I did not want to put in a non-matching sconce or replace 7 sconces, so I made a new one.
Some of the pain would have been lessened by making a better mold.
Used old plastic trash basket. Created an inner wall to save on mold material.
Made an upper wall, again to save on mold material. Used an existing good sconce to create the mold.
Big bowl of mold gel. Was not sure how much I’d need. I needed all of it, and more.
Changed to using silicone to hold the walls in place, heated the mold gel in a microwave, poured it in.
Mold cooled.
Cut out the sconce by removing the back. I probably should have left a little flap in place. Registration, i.e. alignment, is important.
Tried ComposiStone (faux pottery stuff (Smooth Plaster/Cement.) Does not work well with thin-walled sconce.
Switched to using heat-resistant epoxy. Note my sophisticated jig.
Initial result.
Cleaned it up a bit.
But there were issues. Supporting the sconce at the edges during the molding process was problematic, also it was difficult to precisely position the back of the mold into the front.
Side had issues too.
Created a new mold (the stuff is reusable.) This time I supported the sconce in the middle with a little box.
Added mold material to the bottom. (still an issue at the bottom, I had to do it again).
The side still needed work. (I did it again).
Eventually I got a good (enough) casting. I had to do a lot of sanding to incorporate the extra material, smooth things out. I used a palm sander. I used a Dremel for the bulb and outlet holes, drilled out the screw holes.
What I got was a fairly clean but matte sconce. I wanted glossy. So I did a “pour-over” technique, spreading with an artists brush. It worked well, just left drips on the bottom edge to be sanded.
Mounted it on the wall.
Closer. The back edge is caulked so slightly irregular.
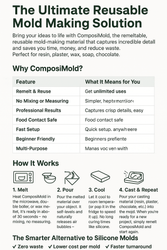
ComposiMold will allow you to practice basic molding techniques to become a successful moldmaker. ComposiMold and ImPRESSive Putty are suitable for beginners. Whether you are interested making a mold for reproducing a sculpture, a toy, a figure, industrial patterns, architectural molding, dog prints, antique picture frames, taxidermy, the texture of a piece of fabric, you start by making a flexible [...]
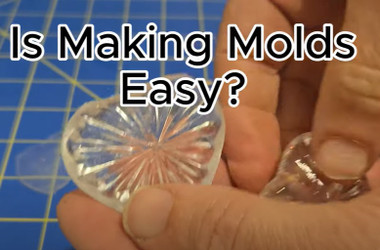
I'm pretty sure nothing is lower cost in the long run. Mold making is fun and with ComposiMold it can be low cost. Here's a video showing the simple steps for mold making, plus some strange sounds. Low cost mold making has to do with the mold making material. Many videos suggest using the silicone with corn [...]
. How Much ComposiMold do you need? ComposiMold has virtually no shelf-life if kept covered. It’s a handy a tool for mold making to keep around. [...]
Mold Making Terms and DefinitionsThis is an excerpt from our free mold making and casting ebook available on our website. CASTING MATERIAL A casting material is a material that will take on and keep the shape that a mold gives.COMPOSIMOLD ComposiMold is a reusable mold making material that works by melting and pouring. Many casts can be performed using the same mold. [...]
Here's the process for making super cool beeswax candles using ComposiMold Reusable Mold Making The key is to chill the ComposiMold mold prior to pouring in the wax.Be sure to check out many other videos on our YouTube channel and our mold making website. Free candle ebook available hereOnce you are ready to create a unique candle, melt the wax [...]
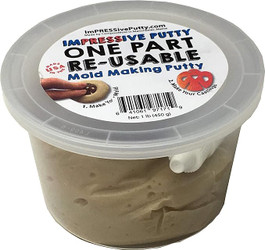
What's the difference between ImPRESSive Re-Usable Mold Making Putty MIX and ImPRESSive Re-Usable Putty? BOTH ARE REUSABLE MOLD MAKING PUTTIES that allow you to Make molds anytime you want. The MIX comes as one part that needs to be heated and kneaded prior to your first use. The Putty comes already mixed and heated. That's the only difference. -Heat and [...]
Fix an ornate gold frame with a missing cherub by making an ImPRESSive Putty mold of one that is still intact. Cast it with a variety of materials. We use Clear Casting Plastic and paint it to look antiqued to match the frame.The process consists of making your mold with the reusable mold making materials, [...]
We see a lot of these DIY mold making videos that show you how to use a silicone caulking to make your own mold molds. The reason the caulking is suggested is because it is cheap, and it is lower cost than most silicone mold making materials. However, compare that to a mold making material [...]
ImPRESSive Putty is a reusable molding putty to replace the silicone putty that can only be used once. ImPRESSive Putty can be used as many times as you want. Heat, press to mold, and cast.Two versions of ImPRESSive Reusable Mold Making Putty are available. ImPRESSive Putty MIX and ImPRESSive Putty. The Mix is cheaper, but requires you to heat [...]